
Bathroom renovation mistakes in Greater Montreal can cause leaks, mould, cracked tile, electrical problems, permit delays and expensive repairs hidden behind finished surfaces. The most serious errors usually happen when demolition begins before the design is complete or when plumbing, electricity, ventilation, structure and waterproofing are treated as separate projects.
Author bio: This article was prepared by a residential-renovation content specialist familiar with Québec permitting, building-envelope principles, electrical and plumbing coordination, and moisture-control guidance from public authorities. It provides general educational information only. Permit requirements, structural conditions, product specifications and code details must be confirmed for the municipality and the specific building.
A bathroom is a compact room with a surprisingly high concentration of technical risk. It may combine plumbing, electricity, ventilation, waterproofing, tile, cabinetry, heating, insulation and structural work within only a few square metres.
When one trade changes a wall, floor or fixture location without coordinating with the others, the problem may remain hidden until:
- tile cracks;
- a ceiling below develops a stain;
- a fan fails to control humidity;
- a shower retains water;
- a vanity drawer hits the door casing;
- an electrical box becomes buried;
- a fixture no longer fits the finished opening.
The risk is amplified by Greater Montreal’s varied housing stock. A bathroom in a century-old Montreal duplex, a 1960s Laval bungalow, a newer Mirabel house and a South Shore condominium may look similar after demolition, but the framing, plumbing, ventilation, ownership and permit conditions can be completely different.
Cold winters also make exterior-wall insulation, air sealing, condensation control and exhaust-duct details particularly important.
The expensive mistakes are rarely about selecting the wrong paint colour. They involve starting without a complete scope, closing walls before testing, relying on tile as waterproofing, moving fixtures without checking the structure and failing to plan how moisture will leave the room.
Eleven Bathroom Renovation Mistakes That Cause Costly Problems
| Mistake | Possible consequence | Better approach |
|---|---|---|
| Demolishing before confirming the scope | Permit delays, missing measurements and unexpected redesign | Document the room and complete the design first |
| Treating tile as waterproofing | Leaks, mould and damaged framing | Use a complete compatible waterproofing assembly |
| Building without a drainage plan | Ponding, poor slope and doorway transitions | Plan drain location, structure, elevations and glass before construction |
| Ignoring ventilation | Condensation, mould and peeling finishes | Design the fan, duct and exterior termination early |
| Moving plumbing without structural review | Damaged joists, beams or ceilings below | Coordinate drain routes with the structure |
| Closing walls before testing | Expensive demolition to correct hidden defects | Test, inspect and photograph before closing |
| Underestimating electrical requirements | Insufficient circuits, unsafe locations and schedule changes | Identify every fixed load before rough-in |
| Choosing incompatible materials | Cracking, staining, slipping or premature failure | Select products for the location and complete assembly |
| Forgetting finished dimensions | Fixtures, glass and cabinetry that no longer fit | Dimension from completed surfaces |
| Buying fixtures at the wrong time | Storage damage, delays or incompatible rough-ins | Use a coordinated procurement schedule |
| Ignoring older-building hazards | Exposure, abatement delays and expanded costs | Test suspect materials and include a contingency |
Bathroom Renovation Mistake 1: Demolishing Before Confirming the Scope
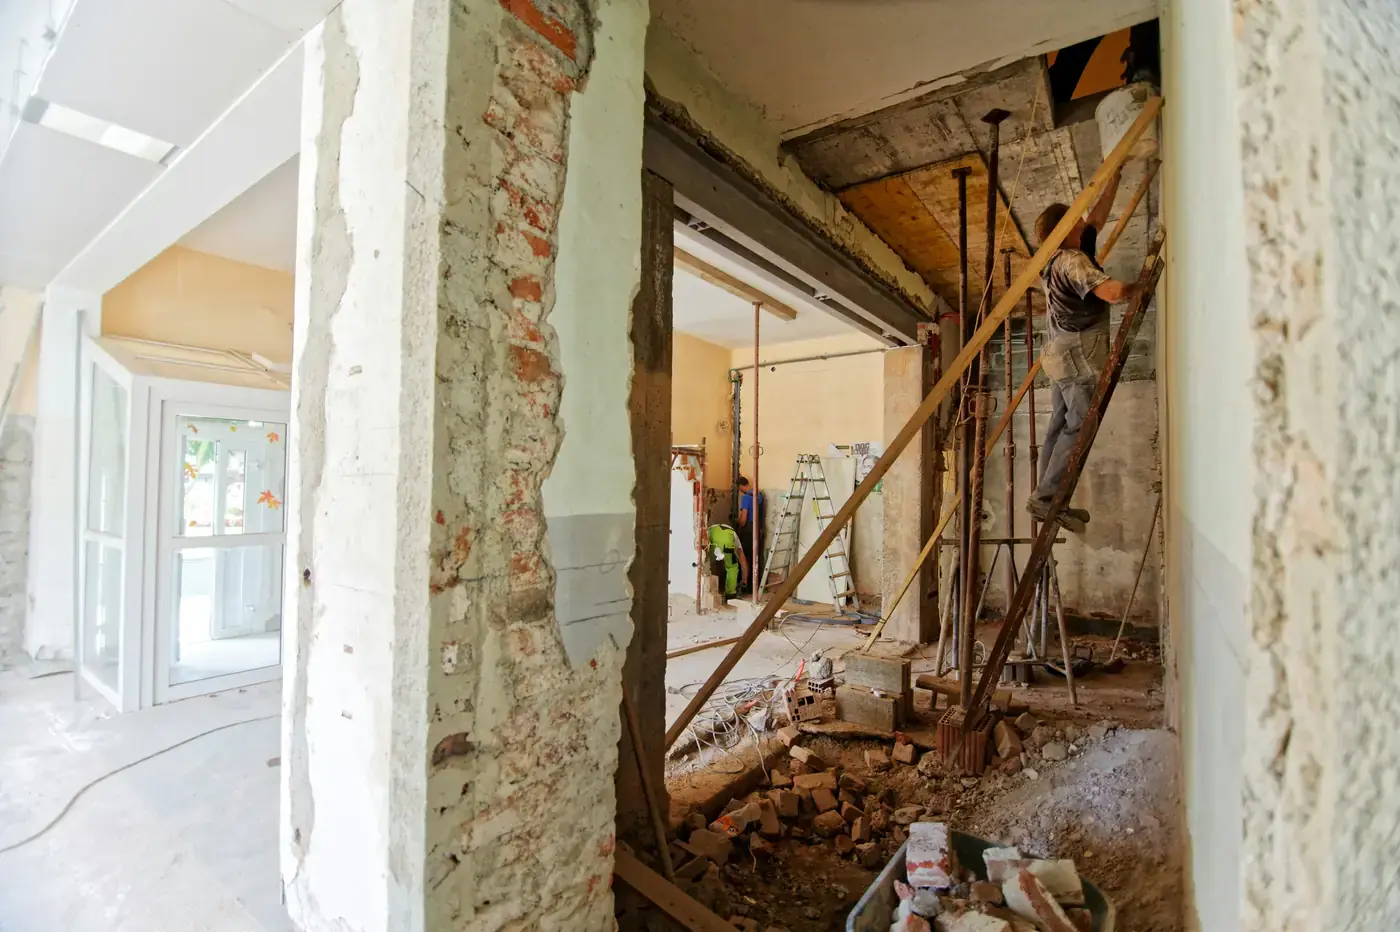
Demolition feels like progress, but it can remove the evidence needed to plan the project accurately.
Before walls, ceilings and floors are opened, document:
- fixture locations and dimensions;
- plumbing shutoffs and visible drainage routes;
- electrical outlets, switches, lighting and heating;
- the fan location and likely duct path;
- floor height at the doorway;
- visible cracks, stains and soft flooring;
- walls that may be structural;
- condominium declarations and co-ownership rules;
- municipal permit requirements;
- materials that may require hazardous-material testing.
A written scope should distinguish a surface renovation from a full reconstruction.
Replacing finishes while keeping every fixture in the same location is different from:
- moving a toilet;
- relocating a shower drain;
- enlarging a window;
- removing or moving a wall;
- installing a curbless shower;
- adding electric floor heating;
- changing the ventilation route.
Municipal requirements vary by location and project scope. Check the applicable municipality before demolition so the project does not become delayed after the bathroom is unusable.
For a broader construction-planning checklist, review our guide on how to prepare your home for a major renovation.
Bathroom Renovation Mistake 2: Treating Tile and Grout as Waterproofing
Tile is a finish. Grout is not a reliable waterproof barrier.
The water-resistant performance of a shower or wet area comes from the complete assembly behind and beneath the visible finish.
A shower assembly may include:
- an approved substrate;
- a sheet or liquid-applied waterproofing membrane;
- sealed corners and transitions;
- properly treated fasteners and penetrations;
- a compatible drain connection;
- properly sloped surfaces;
- manufacturer-approved adhesives and sealants;
- movement joints where required.
These components must be compatible with one another.
Combining one manufacturer’s drain with another system’s membrane, using an unapproved sealant or omitting a specified reinforcement can compromise the assembly.
A water or flood test, when appropriate for the selected system and project, should be completed before tile installation.
Photograph:
- the membrane;
- the corners;
- the drain connection;
- niches;
- benches;
- thresholds;
- pipe penetrations.
These details disappear once the tile is installed.
Bathroom Renovation Mistake 3: Building a Shower Without a Drainage Plan
Water must move toward the drain without ponding.
The finished tile can hide:
- an incorrectly sloped substrate;
- a drain set too high;
- low corners;
- a poorly placed linear drain;
- a threshold that sends water into the bathroom;
- a glass position that does not control splash.
A curbless shower requires more planning than simply removing the curb.
The design must consider:
- floor framing;
- joist direction;
- structural depth;
- drain type and location;
- waterproofing thickness;
- mortar and tile thickness;
- the hallway-floor elevation;
- accessibility objectives.
Cutting or notching joists without structural review can damage the building. Raising the complete bathroom floor to create the required slope can also produce an unsafe transition at the doorway.
Before construction begins, confirm:
- the drain location and connection;
- the required slope;
- the available structural depth;
- the waterproofing method;
- the glass location and splash area;
- the finished elevation at every transition;
- the accessibility requirements.
A drawing showing completed floor heights is more useful than deciding these details during tile installation.
Bathroom Renovation Mistake 4: Ignoring Ventilation and Indoor Humidity
A large or powerful-looking fan will not control moisture if it is undersized, excessively noisy, blocked, poorly ducted or vented into an attic.
Moist bathroom air should be exhausted outdoors through an appropriate duct and exterior termination.
The ventilation design should consider:
- the room’s size;
- the shower or bathtub type;
- how frequently the room is used;
- duct length;
- the number of elbows;
- the fan’s sound rating;
- a backdraft damper;
- insulated ducting through cold spaces;
- the exterior termination;
- a timer or humidity sensor;
- a suitable make-up-air path around or beneath the door.
A fan that performs well under laboratory conditions may move much less air through a long, restrictive or poorly installed duct.
The duct route should therefore be designed before the ceiling is closed.
Energy-efficiency work can also affect ventilation and moisture control. Review our guide to energy-efficient upgrades that make sense in Montreal before tightening exterior walls without considering ventilation.
Bathroom Renovation Mistake 5: Moving Plumbing Without Checking the Structure
Relocating a toilet or shower can require large drainage pipes and precise slopes.
The most convenient route on a drawing may conflict with:
- floor joists;
- engineered structural members;
- beams;
- foundations;
- ductwork;
- the finished ceiling below;
- shared plumbing stacks.
Do not assume a joist can be cut simply because it is hidden.
Holes and notches must respect structural limits. Engineered members also have manufacturer-specific restrictions.
A structural professional may be necessary when the proposed layout requires significant alterations.
Older Montreal buildings may have stacked plumbing shared between several units. Work in one bathroom can therefore affect drainage, venting or access in another unit.
In a condominium, shared pipes or other components may fall under the syndicate’s responsibility even when they pass through a private unit.
Bathroom Renovation Mistake 6: Closing Walls Before Testing and Documentation
Once insulation, wallboard, waterproofing and tile are installed, a small correction can require expensive demolition.
Before closing the walls or floor, verify that the project has addressed:
- plumbing pressure or leak tests where appropriate;
- drainage and venting;
- access to shutoff valves;
- electrical circuits and controls;
- fan operation and exterior termination;
- blocking for grab bars, shower glass and accessories;
- exterior-wall insulation and air sealing;
- required municipal or trade inspections.
Photograph pipes, wires, blocking and framing with measurements before they disappear.
Organize the photographs by wall and save them with the project documents. These records can help future owners avoid drilling into concealed pipes or wiring.
Bathroom Renovation Mistake 7: Underestimating Electrical Requirements
Bathrooms combine water and electricity, so circuit planning and protective devices are essential parts of the design.
The exact requirements depend on the applicable Québec electrical rules, the equipment being installed and the condition of the existing system.
Electrical installation work must be completed by a contractor holding the appropriate licence.
Electrical items may include:
- protected receptacles;
- mirror lighting;
- ceiling lighting;
- shower-area lighting;
- fan power and controls;
- electric floor heating;
- towel warmers;
- bidet seats;
- dedicated circuits;
- bonding and grounding;
- required clearances from tubs and showers.
Adding floor heating after the electrical plan has been completed can affect:
- panel capacity;
- circuit routing;
- thermostat location;
- floor construction;
- the overall schedule.
Every fixed electrical appliance should be identified before rough-in.
Electrical junction boxes must not be buried behind tile, cabinetry or finished ceilings.
Older bathrooms may also contain previous modifications or aging wiring. Review our guide to common electrical problems in older Greater Montreal homes before closing walls containing uncertain electrical work.
Bathroom Renovation Mistake 8: Selecting Materials Without Considering Moisture and Movement
Bathroom finishes must tolerate water, cleaning, temperature variation and movement.
A visually attractive product can fail quickly when installed in the wrong location or over an unsuitable substrate.
Ask:
- Is the tile approved for the floor or only for walls?
- Will the surface become excessively slippery when wet?
- Can the vanity material tolerate standing water?
- Is the paint intended for humid rooms?
- Has exposed wood been appropriately sealed?
- Does the stone require regular maintenance?
- Is the grout appropriate for the joint width and location?
- Can the tile size follow the shower slope?
- Have movement joints been included where necessary?
Large-format tile can create a clean appearance but requires a flatter substrate.
Small mosaic tile often follows a shower slope more easily but creates more grout joints to maintain.
The correct choice depends on the complete assembly, cleaning expectations and long-term maintenance.
Bathroom Renovation Mistake 9: Forgetting Finished Dimensions
Rough framing dimensions are not finished dimensions.
The completed wall or floor may include:
- drywall or tile backer;
- waterproofing;
- mortar;
- tile;
- levelling materials;
- trim and sealant joints.
These layers can reduce the usable width or height enough to affect:
- the bathtub opening;
- toilet clearances;
- shower-glass dimensions;
- vanity drawers;
- cabinet and door swings;
- access panels;
- towel-bar locations;
- the distance between a faucet and backsplash;
- medicine-cabinet depth;
- baseboard and casing alignment;
- alignment with existing windows.
The bathroom should be dimensioned from its finished surfaces.
Products with tight tolerances should be ordered only after critical site dimensions have been verified.
Bathroom Renovation Mistake 10: Buying Fixtures Too Early or Too Late
Buying all fixtures immediately can create:
- storage damage;
- expired return periods;
- missing components;
- incompatibility with the final design;
- unnecessary cash tied up early in the project.
Waiting until installation day can create long delays.
Items that should usually be selected early
- bathtub or shower base;
- drain system;
- in-wall valves;
- toilet rough-in requirements;
- vanity dimensions;
- floor-heating system;
- fan and duct requirements;
- lighting layout.
Items that can often be finalized later
- mirrors;
- towel bars and accessories;
- decorative lighting;
- paint colour;
- some surface-mounted hardware.
Rough-in components must be available before the walls close. Decorative products can often wait until the final dimensions are confirmed.
Bathroom Renovation Mistake 11: Ignoring Older-Building Hazards
Older homes may contain suspect materials in:
- flooring;
- adhesives;
- plaster and joint compounds;
- pipe or mechanical insulation;
- older coatings;
- some wall and ceiling products.
Hazardous materials cannot be reliably identified by appearance alone.
Arrange appropriate testing before disturbing suspect materials. The cost and schedule of required abatement should be included in the project contingency.
Older bathrooms may also conceal:
- rot around tubs and toilets;
- mould behind walls;
- corroded piping;
- undersized or improvised framing;
- abandoned wiring;
- improperly vented drains;
- uneven plaster walls;
- several layers of flooring.
A contingency allowance should reflect the building’s age, renovation history and amount of concealed work.
When choosing between repairing an older wall and rebuilding it, consult our comparison of drywall and plaster in older Montreal homes.
A Better Bathroom Renovation Sequence in 10 Steps
- Define the objectives and constraints. Identify who uses the room, accessibility needs, storage requirements, bathing preferences and whether the bathroom must remain usable during the project.
- Survey and measure the space. Measure the room, ceiling, windows, doors and adjacent spaces. Record floor elevations and locate structural components where possible.
- Confirm permits and professional responsibilities. Ask the municipality which permits and documents are required. Verify contractor licences and determine whether an engineer, architect or designer is needed.
- Complete the design and product schedule. Finalize fixture locations, elevations, electrical loads, ventilation, tile layout and waterproofing system. Identify long-lead products.
- Protect the home. Plan dust containment, floor protection, debris removal and contractor access. In multi-unit buildings, respect work hours and common-area requirements.
- Demolish selectively. Open only what is necessary, preserve evidence of existing conditions and stop when structural, moisture or hazardous-material concerns appear.
- Correct the structure and rough services. Complete framing, plumbing, electrical and ventilation work in a coordinated order. Add blocking for future grab bars and accessories.
- Inspect, test and photograph. Do not close the room until systems have been tested, concealed work documented and required inspections completed.
- Install the building layers in sequence. Coordinate exterior-wall insulation, air control, substrates, waterproofing, flooring and finishes according to compatible details and cure times.
- Commission the completed bathroom. Test drains, shutoffs, fan controls, floor heating, receptacles, lighting and fixtures. Check sealants, glass alignment and door operation.
Common Bathroom Renovation Budget Mistakes
Using a single price per square foot
Bathrooms contain many fixed project costs. Even a small room may require ventilation, electrical protection, plumbing, waterproofing and specialized labour.
Floor area alone is therefore a poor predictor of cost.
Comparing quotations with different scopes
One quotation may include demolition, disposal, permits, waterproofing, plumbing fixtures, painting and cleanup. Another may exclude several of these items.
Compare quotations line by line instead of comparing only the final total.
Spending on finishes before protecting the assembly
Premium tile cannot compensate for a weak floor, failed membrane or inadequate ventilation.
Fund the structure, waterproofing, drainage, ventilation, plumbing and electrical systems before upgrading decorative finishes.
Having no contingency
Older buildings and concealed wet areas contain uncertainty.
A contingency is not permission to overspend. It prevents one hidden discovery from stopping the complete project.
Changing the layout after rough-in
Late changes may require new drains, wiring, waterproofing and tile work.
Finalize the core layout before the regulated trades begin their rough-in work.
Safety and Quality Checks
Stop work and obtain qualified advice when demolition reveals:
- significant mould;
- structural movement;
- suspect insulation or coatings;
- damaged wiring;
- active leaks;
- compromised fire separations;
- unstable floors or ceilings.
Do not perform electrical or regulated plumbing work without confirming the applicable Québec requirements and using the appropriately licensed contractor.
Keep children and pets away from construction areas. Control dust and debris, and do not use the unfinished bathroom until temporary electrical and plumbing conditions are confirmed safe.
Conclusion
The most expensive bathroom renovation mistakes usually occur behind the finished surfaces.
In Greater Montreal, a successful bathroom project must account for moisture, winter conditions, old and new construction methods, municipal requirements and the coordination of several regulated trades.
The practical strategy is to define the scope before demolition, plan drainage and ventilation early, use a complete waterproofing system, coordinate the structure and services, test everything before closing, and document what will disappear behind the walls.
A bathroom built in the correct sequence is easier to maintain, safer to use and far less likely to require premature repairs.
Sources and References
Verify municipal permit requirements, applicable code provisions, product instructions and other time-sensitive information again before publication and construction.
- City of Montréal — Interior renovation permits
- Ville de Laval — Permits finder
- Ville de Mirabel — Urban planning and permits
- Régie du bâtiment du Québec — Construction Code
- Régie du bâtiment du Québec — Work requiring a contractor licence
- Health Canada — Addressing moisture and mould in your home
- Natural Resources Canada — Home ventilation
